February 27, 2005
Where today went is anybody’s guess! The 7.5 hours spent at the hangar just whizzed by. It was pretty cold too today, so the heater was on a lot of the time.
Today was another day of getting the panel finished up. The first task was to sort out the glovebox door. A couple of things needed doing, one was to enlarge the panel hole slightly on the left side of the door, and the other was to figure out a spring mechanism to keep the glovebox door both open and closed. The first task was basically a bit more filing, until the margins around the glovebox door were even. I had to allow a bit for sideplay in the hinge too, and a bit for paint thickness.
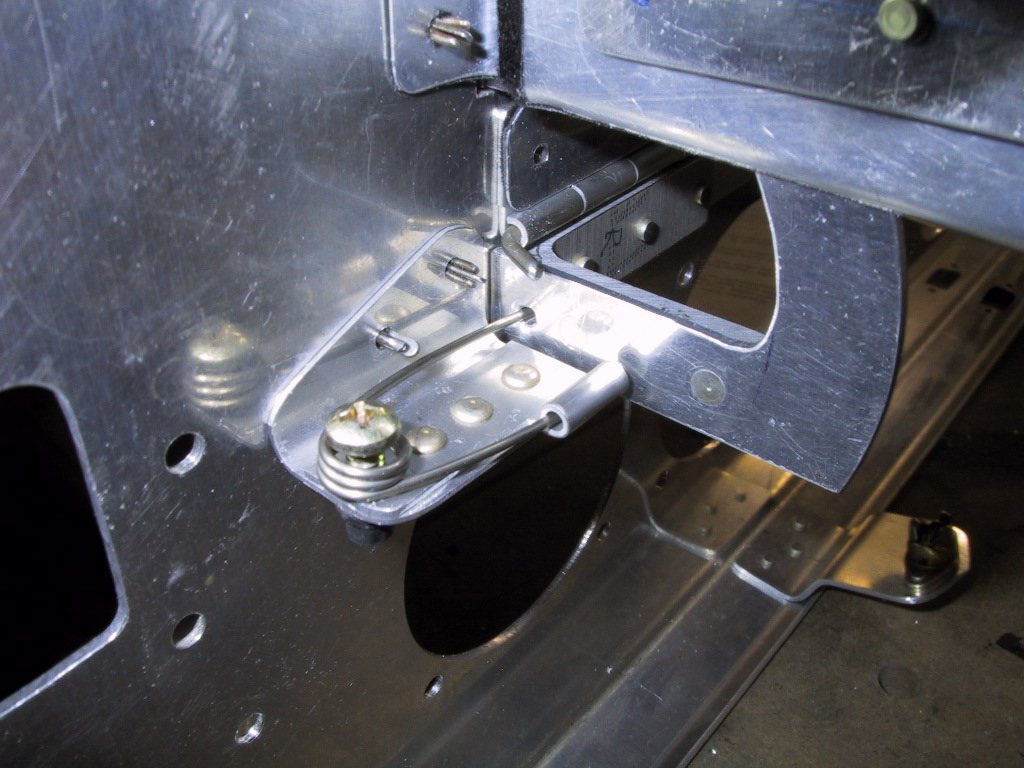
Next task was a little more tricky. I needed to develop some sort of spring mechanism so that there were no nasty camlock fasteners in the door and of course it has to look like a ‘production’ item (at least from the front!). I had bought some stainless torsion springs from McMaster-Carr in a couple of sizes and as it turned out the largest ones I got worked out the best. The key was to find a way to mount the spring so that the hinge would over centre the spring when closed or open. Here’s what I came up with after much trial and more error!
So, this is the door in the closed position. The spring forces the hinge to push against the panel, keeping the door tightly closed.
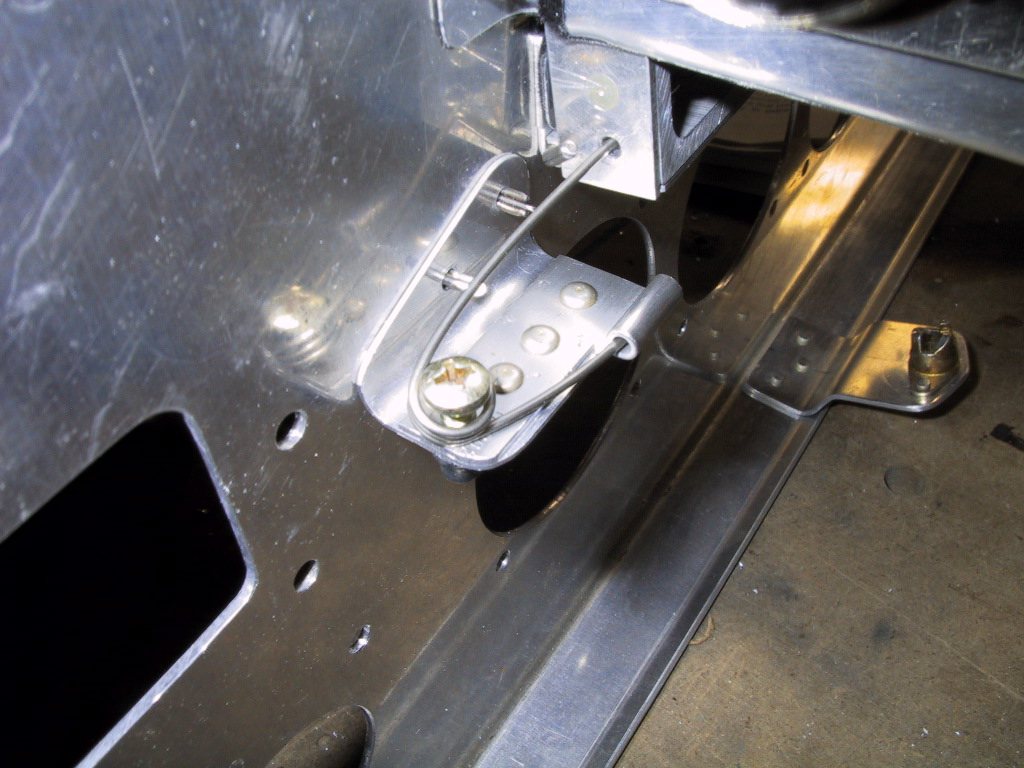
And, this is the door in the open position. The spring now pushes the door hinge toward the panel and upward keeping the door firmly open! There is a symmetrical version on the other side so the forces are equal. I even used springs wound in opposing directions to make sure everything was balanced. It works fantastic! The screw is in there (temporarily until I rivet this lot together) to keep the spring in place and stop it flirting out. I was wearing eye protection the whole time I was messing with this contraption! Needless to say, the screw is a wise idea after losing the spring on the other side of the hangar a few times!
So, once I was done with that, my next task was to paint the glovebox door flat black. I’m actually going to flock the door also, but painting it black first will help hide any bits I miss with the flocked sheet. I rubbed it down real well, and rattle canned it with self etching primer. Then I hit it with the black.
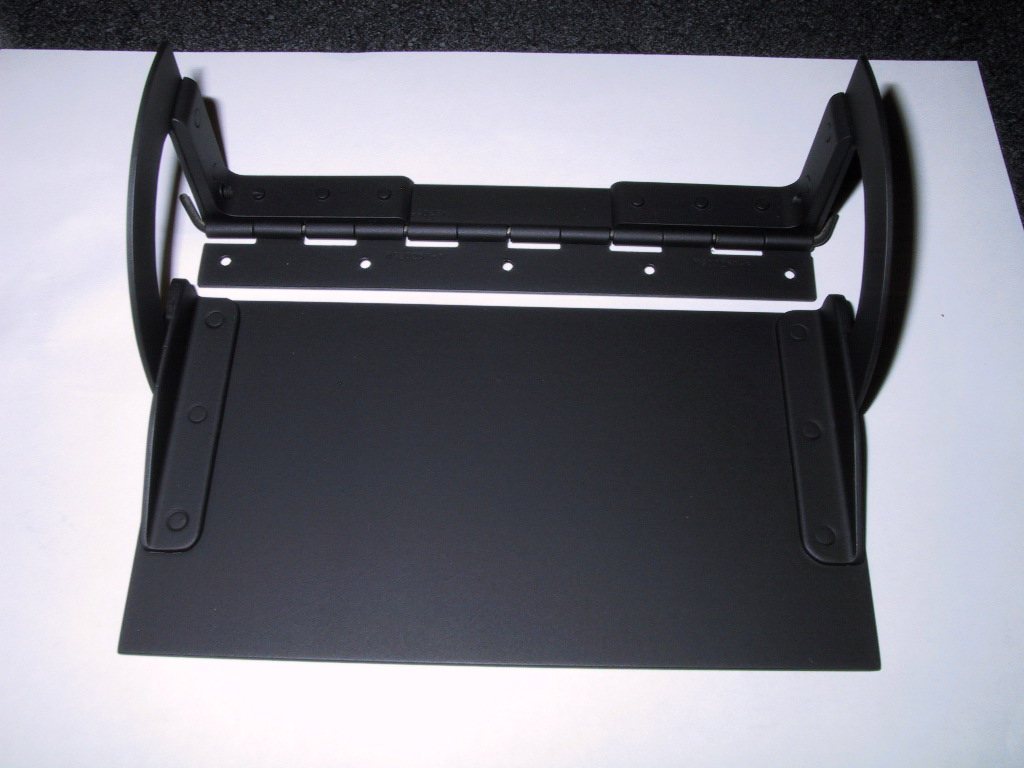
Once the paint is all dry, I’ll cover this thing with flocked sheet. That’s why I didn’t bother hiding the rivets really. They’ll all be covered up. When I was doing the glovebox, I was quite impressed with the way the flock sheet stuck. Pretty permanent, so it shouldn’t come off the intricate shapes too easily.
So, now I have a bit of a dilemma. I need to rivet all this stuff to the panel before I paint the panel. I would also like to fill over the rivets in the panel so they’re invisible. Well… Now what?!!! This has got me thinking. Trouble is, the glovebox door must go on when the glovebox goes on because of the way it all works. All I can say is that I can see some really creative masking coming on. Great.
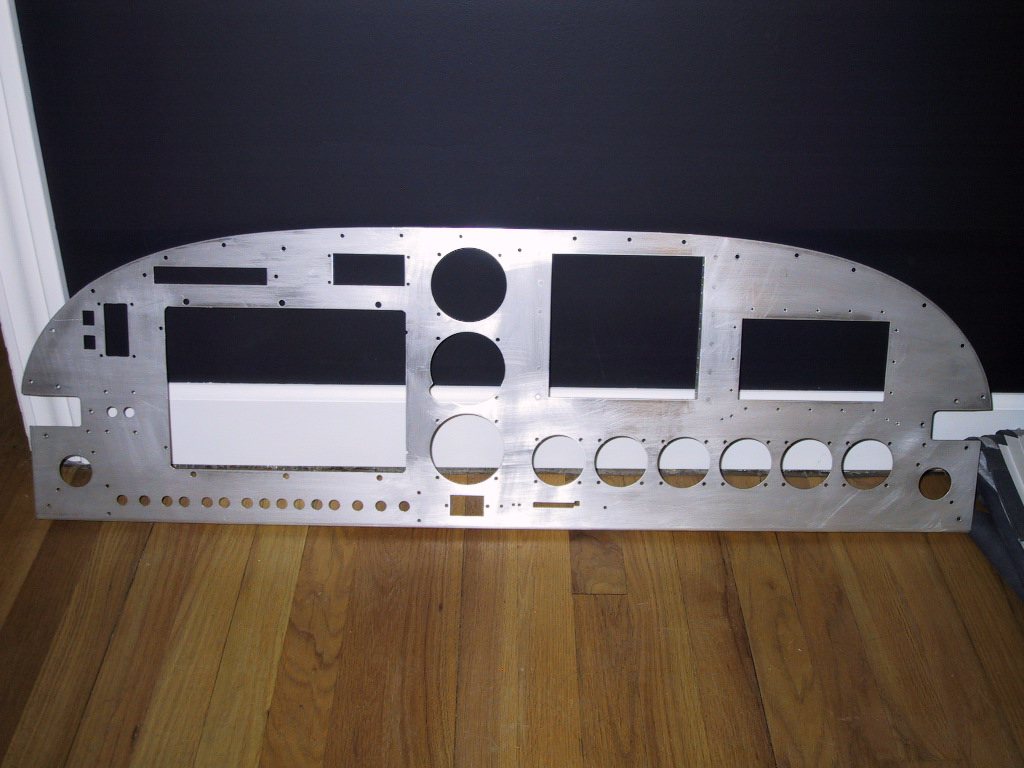
Next task is to make a switch holder for the two FADEC switches that will sit to the left of the EFIS 1. I just made a piece similar to the channel I made for the main switches. You can see the holes in the panel for it.
Well, with all that out of the way, I figured I’d better do some sanding of the panel to remove all the scratches and dings that it had gotten during it’s construction. This took the best part of the day, and gave me some pretty sore arms! Some of the scratches were too deep to sand out, so I have some Superfil for that. Here’s the first step sanding done. I’m now ready for some Superfil. I’ve decided to do as much filling and sanding as possible without the glovebox and door on. I’m gonna have to do some around the glovebox door directly, but that’ll have to be later.